Sunday, October 16, 2011

Cable-Marking Supplies


One of the worst legacies of installed cabling systems (and those yet to be installed) is a profound lack of documentation. If you observe a professional data cable installer in action, you will notice that the cabling system is well documented. Though some professionals will even use color coding on cables, the best start for cable documentation is assigning each cable a number. ANSI/TIA-606-B provides specifications about how to document and label cables.

Cable-Marking Labels

The easiest way to number cables is to use a simple numbering system consisting of strips of numbers. These strips are numbered 0 through 9 and come in a variety of colors. Colors include black, white, gray, brown, red, orange, yellow, green, blue, and violet. You can use these strips to create your own numbering system. The cable is labeled at each end (the patch panel and the wall plate), and the cable number is recorded in whatever type of documentation is being used.
The numbered strips are often made of Tyvek, a material invented by DuPont that is well suited for making strong, durable products of high-density polyethylene fibers. Tyvek is nontoxic and chemically inert, so it will not adversely affect cables that it is applied to.
These wire-marking labels are available in two flavors: rolls and sheets. The rolls can be used without dispensers. Figure 1 shows a 3M dispenser that holds rolls of wire markers; the dispenser also provides a tear-off cutting blade.


Figure 1: A 3M dispenser for rolls of wire-marking strips
Figure 2 shows a booklet of wire-marker sheets that allow you to pull off individual numbers.
Figure 2: A booklet of wire-marker sheets

Wall-Plate Marking Supplies

Some wall-plate and patch-panel systems provide their own documentation tools, but others don't. A well-documented system includes identifying labels on the wall plates. Figure 3 shows self-adhesive letters, numbers, and icons that can be used with wall plates and patch panels. Check with the manufacturer of your wall plates and patch panels to see if these are part of the system you are using; if they are not, you should use some such labeling system.


Figure 3: Letters, numbers, and icons on self-adhesive strips

Thursday, October 13, 2011

Wire-Pulling Lubricant


Wire- or cable-pulling lubricant is a slippery, viscous liquid goop that you apply to the cable jacket to allow it to slide more easily over surfaces encountered during the cable pull. Wire lubricant (see Figure 1) is available in a variety of quantities, from less than a gallon to five-gallon buckets.


Figure 1: Wire-pulling lubricant
The vast majority of cable jackets for premises cables in the United States are made out of some form of PVC. One characteristic of PVC is that, depending on the specific compound, it has a relatively high coefficient of friction. This means that at the microscopic level, the material is rough, and the rough surface results in drag resistance when the cable jacket passes over another surface. Where two PVC-jacketed cables are in contact, or where PVC conduit is used, the problem is made worse. Imagine two sandpaper blocks rubbing against each other.
In many cases, the use of pulling lubricant is not necessary. However, for long runs through conduit or in crowded cable trays or raceways, you may find either that you cannot complete the pull or that you will exceed the cable's maximum allowable pulling tension unless a lubricant is used.
The lubricant is applied either by continuously pouring it over the jacket near the start of the run, or by wiping it on by hand as the cable is pulled. Where conduit is used, the lubricant can be poured in the conduit as the cable is pulled.
Lubricant has some drawbacks. Obviously, it can be messy; some types also congeal or harden over time, which makes adjustment or removal of cables difficult because they are effectively glued in place. Lubricant can also create a blockage in conduit and raceways that prevents new cables from being installed in the future.
Tip 
Make sure the lubricant you are using is compatible with the insulation and jacket material of which the cables are made (hint: don't use 10W30 motor oil). The last thing you need is a call back because the pulling lubricant you used dissolved or otherwise degraded the plastics in the cable, leaving a bunch of bare conductors or fibers. Also check with the manufacturer of the cable, as the use of certain lubricants may void the warranty of the cable.

Monday, October 10, 2011

Cabling Supplies and Tools


When you think of cabling supplies, you probably envision boxes of cables, wall plates, modular connectors, and patch panels. True, those are all necessary parts of a cabling installation, but you should have other key consumable items in your cabling tool kit that will make your life a little easier.
Some of the consumable items you may carry are fairly generic. A well-equipped cabling technician carries a number of miscellaneous items essential to a cabling install, including the following:
  • Electrician's tape—multiple colors are often desirable
  • Duct tape
  • Plastic cable ties (tie-wraps) for permanent bundling and tie-offs
  • Hook and loop cable ties for temporarily segregating and bundling cables
  • Adhesive labels or a specialized cable-labeling system
  • Sharpies or other type of permanent markers
  • Wire nuts or crimp-type wire connectors
An item that most cable installers use all the time is the tie-wrap. Tie-wraps help to make the cable installation neater and more organized. However, most tie-wraps are permanent; you have to cut them to release them. Hook-and-loop (Velcro-type) cable wraps (shown in Figure 1) give you the ability to quickly wrap a bundle of cable together (or attach it to something else) and then to remove it just as easily. The hook-and-loop variety also has the advantage of not over-cinching or pinching the cable, which could cause failure in both optical fiber and copper category cables. Hook-and-loop cable wraps come in a variety of colors and sizes and can be ordered from most cable equipment and wire management suppliers.


Figure 1: Reusable cable wraps

Thursday, October 6, 2011

Optical Fiber Testers


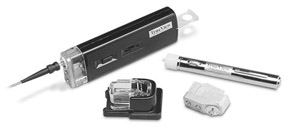
Optical fiber requires a unique class of cable testers. Just like copper-cable testers, optical fiber testers are specialized. Figure 1 shows a simple continuity tester that verifies light transmission through the cable.

Figure 1: An optical fiber continuity tester
Another type of optical fiber test device is the power meter (also known as an attenuation tester), such as the one shown in Figure 2. Like the continuity tester, the power meter tests whether light is making its way through the cable, but it also tests how much of the light signal is being lost. Anyone installing fiber-optic cable should have a power meter. Most problems with optical fiber cables can be detected with this tool. Good optical fiber power meters can be purchased for less than $1,000.


Figure 2: An optical fiber power meter
Note 
An attenuation tester checks for how much signal is lost on the cable, whereas a continuity tester only measures whether light is passing through the cable.
Many high-end cable testers, such as those available from Hewlett-Packard, Microtest, and others, can test both optical fiber and copper cables (provided you have purchased the correct add-on modules). You need to know a few points when you purchase any type of optical fiber tester:
  • The tester should include the correct fiber connectors (ST, SC, FC, LC, MT-RJ, etc.) for the types of connectors you will be using.
  • The tester should support the type of fiber-optic cable you need to test (single-mode or multimode).
  • A power meter should test the wavelength at which you require the cable to be used (usually 850 or 1,300nm).
Professional fiber-optic cable installers usually carry tools such as an OTDR that perform more advanced tests on optical fiber cable. OTDRs are not for everyone, as they can easily cost in excess of $30,000. However, they are an excellent tool for locating faults.